
Hello everybody, welcome to my recipe page, If you're looking for new recipes to try this weekend, look no further! We provide you only the best How To Make Shokupan | Japanese Sandwich Bread recipe here. We also have wide variety of recipes to try.
Before you jump to How To Make Shokupan | Japanese Sandwich Bread recipe, you may want to read this short interesting healthy tips about Guidelines For Living Green And Saving Money Within the Kitchen.
Until fairly recently any individual who portrayed concern about the wreckage of the environment raised skeptical eyebrows. Those days are over, and it seems we all realize our role in stopping and perhaps reversing the damage being done to our planet. According to the specialists, to clean up the natural environment we are all going to have to make some improvements. Each and every family should start creating changes that are environmentally friendly and they must do this soon. Keep reading for some methods to go green and save energy, largely in the kitchen.
Changing light bulbs is as good a spot to start as any. Naturally you shouldn't confine this to merely the cooking area. The usual light bulbs are the incandescent type, which must be replaced with compact fluorescent lightbulbs, which save energy. They cost a little bit more in the beginning, but they last ten times longer, and use less electricity. Using these longer-lasting lightbulbs has the particular benefit that many fewer lightbulbs make it into landfills. It goes further than merely swapping the lights, though; turning off lights that aren't needed is actually another good thing to do. The family spends a lot of time in the kitchen area, and how often does the kitchen light go on in the morning and is left on all day long. And it's not limited to the kitchen, it goes on in other parts of the house as well. Make a practice of having the lights on only when they are required, and you'll be amazed at the amount of electricity you save.
The kitchen on its own gives you many small methods by which energy and money can be saved. Efficient living is definitely something we can all do, without difficulty. A lot of it is merely making use of common sense.
We hope you got insight from reading it, now let's go back to how to make shokupan | japanese sandwich bread recipe. To cook how to make shokupan Here is how you do it.
The ingredients needed to make How To Make Shokupan | Japanese Sandwich Bread:
- You need of Yudane:.
- Take 75 g of Bread Flour,.
- Provide 125 g of Boiling Water,.
- Take of Dough:.
- Use 325 g of Bread Flour,.
- Get 30 g of Demerara Sugar,.
- Take 7 g of Sea Salt,.
- You need 6 g of Active Instant Dry Yeast,.
- You need 50 g of Heavy Whipping Cream,.
- Get 200 g of Water,.
- Use of Room Temperature Softened Unsalted Butter, 25g + More For Greasing.
Instructions to make How To Make Shokupan | Japanese Sandwich Bread:
- Prepare the yudane. In a shallow bowl, add flour and water. *The water has to be boiling.* Stir to combine well..
- It should be a sticky roux. Spread out to cool down faster. Cover with a damp lint-free kitchen towel. Set aside to cool down to room temperature..
- Prepare the dough. In a large bowl, combine flour, sugar, salt and yeast well. *Do not add the yeast directly on the salt. It will kill the yeast.* Gradually pour the water and cream into the flour mixture while still mixing with a spatula..
- Once it becomes a dough, knead the dough inside the bowl until all the nooks and crannies of flour are kneaded into the dough, about 5 mins. Transfer onto a lightly floured surface. Add in the yudane..
- Knead for about 5 mins until the yudane is fully incorporated. Add in the butter. Continue kneading for another 3 to 5 mins. *Do take note that the yukane and butter has to be at room temperature.*.
- The dough should be tacky, fluffy, smooth and it should pass the "window-pane" test. If the dough is too dry, add in water, 1 TBSP at a time. If the dough is too sticky, add in flour, 1 TBSP at a time. Lightly grease the bowl with some butter..
- Transfer the dough back to the greased bowl. Cover with a damp lint-free kitchen towel and let rise for 30 mins. It should slightly risen. Punch down the dough and fold the top, sides and bottom to the center. Flip, cover and let rise for 1 hr..
- This process is sorta to ensure that the yeast is activated. The dough should doubled in size. *You can do a test by poking a floured finger into the dough. If it doesn't spring back, the yeast is activated properly and the dough is ready.* Transfer the dough onto a lightly floured surface. Divide the dough into 2 equal pieces..
- Form each piece into balls. Cover with a lint-free kitchen towel and let rest for 15 mins. This is call the bench rest which allows the gluten to relax. Grease bread pan with butter..
- Pat down a dough ball to an oblong disc. Fold the top 2/3 way to the bottom. Using the heel of your palm, gently press down the sim..
- Fold the bottom 2/3 way to the top. Using the heel of your palm, gently press down the sim. Rotate 90 degrees..
- Fold the top 2/3 way to the bottom. Gently pinch down the sim. Fold the bottom 2/3 way to the top..
- Gently pinch the sim. Roll the dough simmed side down to form a ball..
- Transfer into the greased bread pan. Repeat the process for the remaining dough. You will have 2 dough balls, side by side in your loaf pan. Cover with a damp lint-free kitchen towel and let rise for 40 to 50 mins..
- Preheat oven to 200 degree celsius or 400 fahrenheit. The dough balls should rise about 1/2 inch away to the top of the loaf pan. Close the lid and wack into the oven..
- Bake for 40 to 1 hr or until the crust is golden brown. Remove from oven. Immediately unmold onto a wire cooling rack..
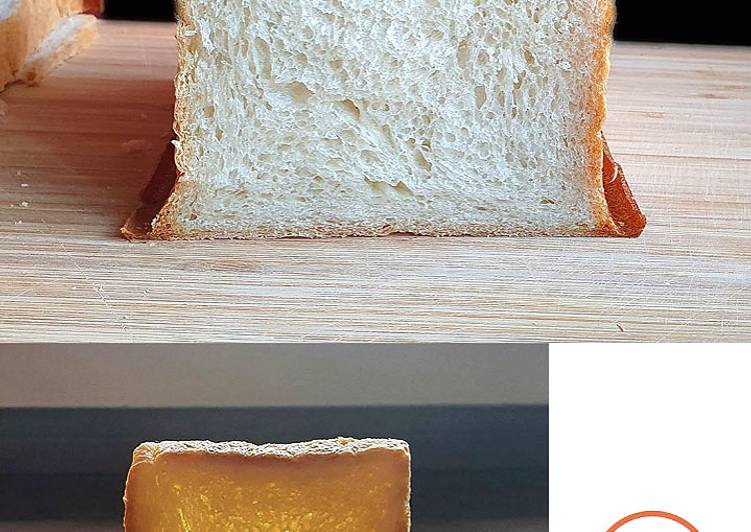
- Set aside to cool down completely before slicing. Use this sandwich bread for your sandwich adventures, or simply make a toast. I just simply spread my gianduja..
That's why I set out to make my own version that. PPS: How to Activate, Feed, and Maintain A Sourdough Starter. Simple Sourdough Toasting Bread: What You Need. I would like to incorporate some rye or whole wheat flour. Can you please recommend how much I can add without compromising too much on taste?
If you find this How To Make Shokupan | Japanese Sandwich Bread recipe helpful please share it to your close friends or family, thank you and good luck.